
In the world of industrial machinery and equipment, efficiency and reliability are paramount. One crucial aspect of ensuring the smooth operation of various machines, from conveyor systems to power transmission equipment, is proper belt tensioning.
Belt tension is critical for both conveyor belt maintenance and power transmission belts, such as with V-belts. The V-belt, a common type of power transmission belt, plays a pivotal role in many industries. To maintain optimal performance and extend the lifespan of power transmission belts, it is essential to use a belt tension gauge correctly.
In this comprehensive belt tension gauge guide, we will explore the ins and outs of using a belt tension gauge for industrial belt tensioning.
Understanding the Importance of Belt Tensioning
Before delving into the specifics of using a belt tension gauge, it’s important to grasp why calibrated belt tensioning is so vital in industrial applications. V-belts are used to transmit power between a drive pulley and a driven pulley, and their effectiveness largely depends on the right amount of tension.
Improper belt tensioning on a power transfer belt can damage your bearings, pulleys, and motor, which is why it is important to regularly check your belts with a belt tension gauge.
Here are some reasons why belt tensioning is critical.
1. Power Transmission Efficiency
Properly tensioned V-belts ensure efficient power transfer from the source to the destination. When belts are too loose, they slip on the pulleys, leading to energy loss and reduced system performance. Conversely, over-tensioned belts can cause excessive stress on components, leading to premature wear and failure.
2. Belt Longevity
Optimal tensioning helps extend the lifespan of V-belts. When belts are too loose, they may become misaligned or damaged due to excessive flexing. Over-tensioning can accelerate wear and tear, causing belts to break prematurely. Correct belt tensioning ensures that belts wear evenly and last longer.
3. Reduced Maintenance Costs
Properly tensioned belts require less maintenance. Loose belts tend to need frequent re-tensioning, while over-tensioned belts can lead to increased maintenance and replacement costs. By maintaining the right tension, you can reduce downtime and associated expenses.
4. Safety
In industrial settings, safety is paramount. Improperly tensioned belts can pose safety hazards. Loose belts may suddenly snap, while over-tensioned belts can stress pulleys and shafts, leading to unexpected failures and accidents. Correct tensioning helps prevent such incidents.
How Often Should a Belt’s Tension Be Checked?
In order to achieve efficient power transfer and extend the service life of a transmission belt, the tension should be checked regularly. Belt tension should be checked during the initial installation of a V-belt, again after one or two days of operation, and then again every three to six months. Record your results and the dates to establish a baseline. By keeping up with your maintenance, you save time and money in the long run.
Introducing the Belt Tension Gauge
 To achieve optimal belt tension, industrial professionals rely on a specialized tool known as a belt tension gauge. This device allows for precise measurement of belt tension, ensuring that it falls within the manufacturer’s recommended range.
It is important to note that despite traditional wisdom, the “thumb test” to check the tension on a belt is not an accurate measurement and should never be used. Many businesses still use this method to measure the tension on a belt and frequently have to replace belts due to incorrect tensioning. Only a belt tension gauge can give an accurate belt tension measurement.
Belt tension gauges come in various types, including mechanical and digital models. The choice of gauge depends on the specific application and user preference.
Types of Belt Tension Gauges
Mechanical Belt Tension Gauges
Mechanical tension gauges, or analog tension gauges, are simple tools widely used in industrial settings. They consist of a spring-loaded mechanism and a scale that indicates tension in units such as pounds or newtons. When used correctly, these gauges provide accurate tension readings. The most common mechanical tension gauge is the pencil tension gauge, also known as a mechanical tension checker.
Digital Belt Tension Gauges
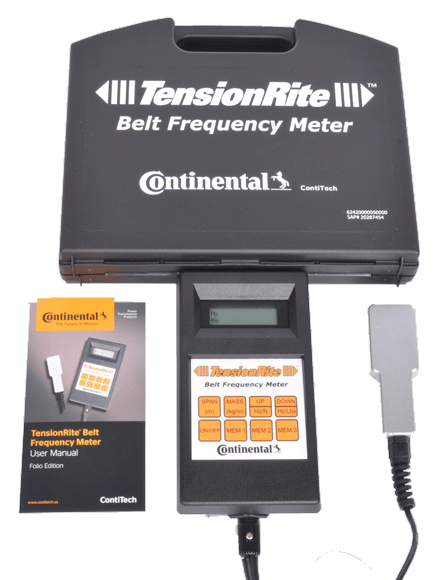
Digital tension gauges have gained popularity due to their ease of use and precision. They feature electronic sensors that measure belt tension and display the results digitally. Many digital gauges also provide additional features like data storage and connectivity to other devices. The most common digital tension gauge is the belt frequency meter.
Choosing the Right Belt Tension Gauge
Consider the following factors when choosing a belt tension gauge:
- Application: Determine the type of belts you’ll be working with and the specific requirements of your machinery.
- Accuracy: Depending on the level of precision required, choose a gauge that offers the necessary accuracy.
- Ease of Use: Consider the usability of the gauge, especially if it will be used by multiple operators.
- Budget: Evaluate your budget constraints and choose a gauge that meets your requirements without overspending.
The advantage of a pencil belt tension gauge is that it is relatively inexpensive and precise. Using the pencil gauge can be somewhat time-consuming and tedious, however. If you have a lot of belts to check, it may be worth considering a belt frequency meter.
Belt frequency meters are more expensive than analog belt tension gauges. However, they are quick, easy, and very accurate. Pencil tension gauges are much more accurate than the thumb test, and belt frequency meters are more accurate than a pencil gauge. If you have enough power transmission belts to check, a digital tension gauge will pay for itself just from the saved labor alone.
Once you’ve selected the right belt tension gauge for your needs, it’s time to learn how to use it effectively.
How to Use a Belt Tension Gauge
Proper usage of a belt tension gauge is crucial to achieving accurate results. Here’s a step-by-step guide on how to use a belt tension gauge for industrial V-belt tensioning.
Step 1: Safety Precautions
Before starting any maintenance task, ensure that the machinery is powered off and locked out to prevent accidental startup. Use appropriate personal protective equipment (PPE), including safety glasses, to protect yourself during the process.
Step 2: Inspect the Belts
Visually inspect the V-belts for signs of wear, damage, or misalignment. If you notice any issues, address them before proceeding with tension measurement.
 Step 3: Establish the Correct Tension
 Step 3: Establish the Correct Tension
Consult the manufacturer’s specifications or guidelines to determine the recommended tension for your V-belts. This information is crucial for achieving optimal performance and longevity. If you cannot find that information, refer to this V-belt tensioning table.
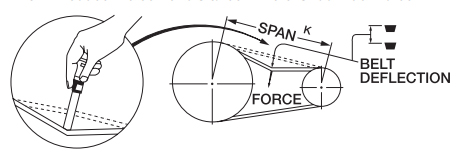
Measure the distance between the center of each of your pulleys, marked as K on the diagram.
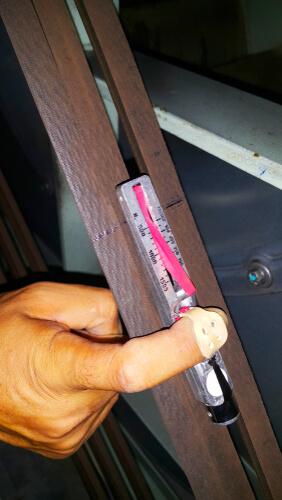
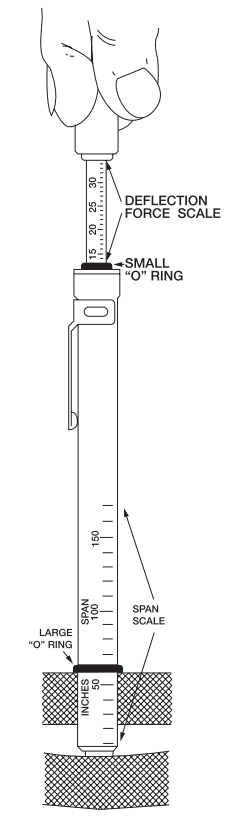
The image on the right side depicts how to use a mechanical pencil tension gauge. Slide the large O-ring on the bottom of the gauge to reflect the distance between the two pulleys.
Ensure that the small O-ring is set to zero so it is ready to record the results.
Step 4: Position the Gauge
Place the belt tension gauge in the correct position on the V-belt. The gauge should be perpendicular to the belt’s centerline and positioned in the center on the span between the pulleys as shown in the arrow for “belt deflection” in the diagram above. If you are too close to a pulley, the reading will not be accurate.
If there is only a single belt, place a straight-edge ruler on top of the pulleys so you know how far down you should press. If there are multiple belts, the other belts will also functionally serve as a placeholder like the ruler.
Step 5: Apply Tension
Activate the tension gauge according to the manufacturer’s instructions. Mechanical gauges typically require manual force to compress the spring, while digital gauges may require a button press or other actions.
In the case of a mechanical pencil gauge, you will push down until the large O-ring reaches the same height as another belt or the straight-edge ruler.
Step 6: Read the Tension
Observe the tension reading displayed on the gauge. A digital reader will display the pounds of pressure. The small O-ring will have been pushed up the pencil gauge to give a reading on the scale. It won’t be quite as accurate as a digital reader, but it is much better than using the thumb test.
Ensure that the reading falls within the recommended range specified by the manufacturer.
Step 7: Adjust Tension If Necessary
If the tension reading is outside the recommended range, make the necessary adjustments. To reduce tension, loosen the tensioning device (e.g., an adjustable motor base). To increase tension, tighten the tensioning device.
Step 8: Recheck & Fine-Tune
After making adjustments, recheck the tension using the gauge. Repeat the process of adjustment and rechecking until the tension falls within the specified range.
Step 9: Document & Maintain
Record the tension measurement and any adjustments made. This documentation helps in tracking the maintenance history of the V-belts. Regularly monitor and maintain the tension to ensure consistent performance.
How to Measure Belt Tension with a Belt Tension Frequency Meter
A tension frequency meter can measure the natural frequency of the tensioned belt and use that information to calculate the tension. This frequency method can be used to calculate the frequency for V and banded belts.
Follow these steps to learn how to use a belt tension frequency meter:
Step 1: Safety Precautions & Visual Inspection
Do not skip the standard safety precautions. Power down the equipment and tag and lock it out. Perform a visual inspection on the belt, checking for fraying, nicks, or other damage. Address any issues before proceeding.
Step 2: Determine the Correct Belt Tension
Follow the manufacturer’s guidelines for appropriate belt tension to determine the recommended tension.
Step 3: Input the Belt’s Information Into the Meter
Load the belt’s span and mass data into the meter so it knows what it is calculating. The mass information can be provided by the belt manufacturer.
Banded belts can be treated as a single unit with the belt mass calculated as a multiple of a single belt value.
Step 4: Aim the Sensor
Position the sensor as close to the center of the selected belt span as possible to get an accurate belt tension reading. Ideally, orient the sensor with the long edge parallel to the belt centerline with an approximate half-inch gap.
If the span is too short, it may result in inaccurate readings that are much higher than the actual belt tension due to belt stiffness. Check your meter’s instruction manual.
If the top of the belt is not easily reachable, you can set the sensor against the edge of the belt instead.
Step 5: Tap the Belt
The meter measures the vibrations in the belt to determine the tension. Tap the belt with the handle of a small tool to make it vibrate for the reading. The meter will report the belt tension in units of force.
Take three successive readings and record the results for consistency purposes. If the readings vary by more than ten percent, reassess your measuring technique.
Note on Low Tension Belts: The meter will not measure belts that are under extremely low tension. If the meter is not responding, increase the tension until it does.
Step 6: Adjust & Fine-Tune Tension as Necessary
Check your reading against the manufacturer’s recommended belt tension level. If they do not match up, adjust and re-check the tension, repeating this process until it is in line with manufacturer recommendations.
Step 7: Document Tension Readings
Make sure to record the tension measurement and any adjustments made. This documentation will help maintenance staff track the maintenance history. With a historical log, you can see which V-belts will need tensioning after so many months of use, and have a general sense of when belts will need to be replaced.
6 Tips for Accurate Belt Tensioning

Achieving precise belt tension requires attention to detail and practice. Here are some additional tips to enhance the accuracy of your belt tensioning process.
1. Use the Right Gauge for the Job
Ensure that the selected tension gauge is suitable for the type and size of V-belts you are working with. Using an incorrect gauge can lead to inaccurate readings. If you are measuring a type AX V-belt, make sure your gauge is suitable for that kind of belt.
2. Follow Manufacturer Guidelines
Always refer to the manufacturer’s recommendations for belt tension levels and adjustment procedures. Following these guidelines ensures that your equipment operates as intended.
3. Hand Rotate the Belt
Rotate the belt by hand for at least one full revolution to ensure the belt is properly seated and aligned and to normalize the components. Normalizing the components will give you a more accurate reading.
4. Tensioning Multiple or Complex Belts
If you are tensioning different V-belts, use a belt towards the center.
For longer V-belts or complex systems, measure tension at multiple points along the belt to ensure uniform tension distribution.
6. Monitor Tension Regularly
Belt tension can change over time due to wear and environmental factors. Implement a regular inspection and tensioning schedule to maintain optimal performance. V-belt tension should be checked on installation, 24 to 48 hours after installation, and then every three to six months.
Common Belt Tensioning Mistakes to Avoid
Even with the best intentions, mistakes can happen during the belt tensioning process. Here are some common errors to watch out for and avoid.
Over-Tensioning
Excessive tension can cause premature belt and pulley wear. Avoid over-tensioning, especially with older belts that may have reduced elasticity.
Under-Tensioning
Loose belts can slip on the pulleys and lead to reduced power transmission efficiency. Ensure that belts are adequately tensioned according to the manufacturer’s specifications.
Ignoring Visual Inspections
Visual inspections are crucial for identifying worn or damaged belts. Neglecting these inspections can lead to overlooked issues that affect performance.
Using the Wrong Gauge
Using an inappropriate tension gauge for the job can result in inaccurate readings and improper tensioning.
If you need assistance with industrial machinery maintenance, or you need training for your maintenance staff, rely on the experts at IBT Industrial Solutions. Our expert technicians know the best practices for all different types of machinery and equipment. Contact us today to learn more about how we can save you time, equipment, and money.
A Quiet, Efficient Option
If you’re looking for a superior synchronous belt, Continental now offers the Conti SilentSync. It stands apart due to its combination of a helical tooth design, aramid tension member and strong rubber. It is self-tracking, has a high power capacity, and can also withstand high temperatures– all of which makes this synchronous belt more resistant to shearing action on high-performance drives.
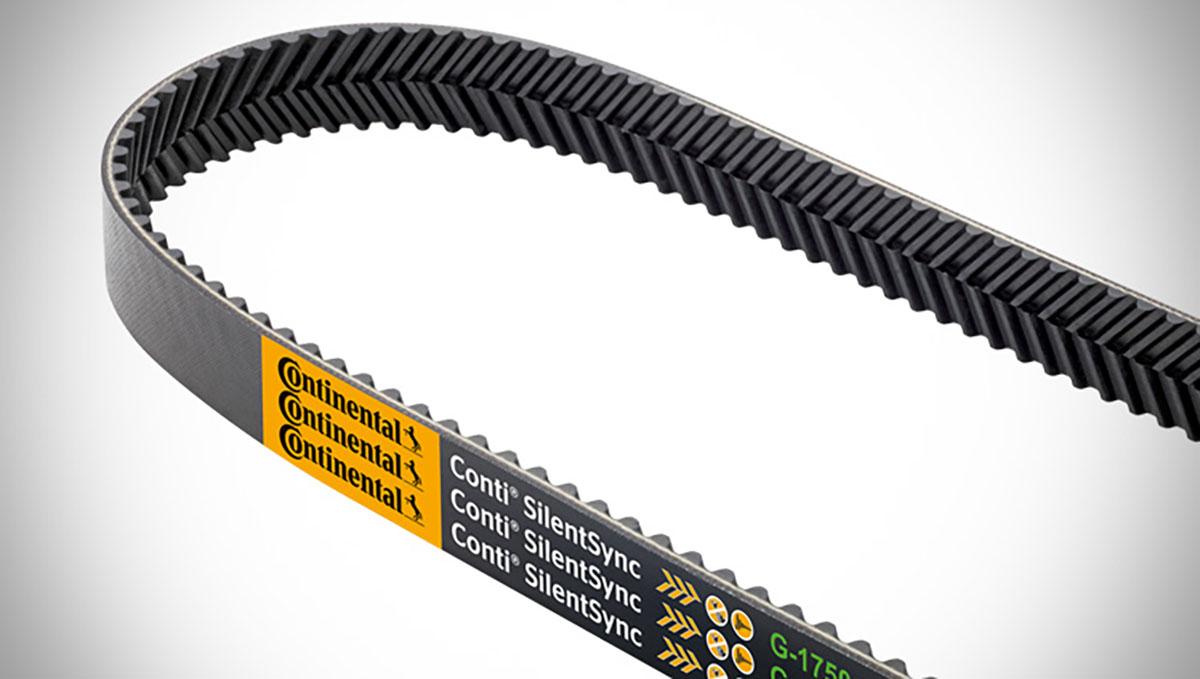
The SilentSync also offers up to 19 dB of noise reduction due to continuous tooth engagement. This reduces vibration and improves system efficiency– making it more likely your tension checks will pass with flying colors. Synchronous belts are up to 98% energy efficient, offering significant energy savings as compared to traditional V-belt drives.
Want to learn more? Contact us today to learn more about all the ways we can save you time, equipment, and money.